Call Recording Setup
Enable call recording for your AI receptionist to capture and review conversation details, ensuring you never miss important customer interactions.Enabling Call Recording
Step 1: Navigate to Advanced Settings

- Log into your Welco AI dashboard
- Click on My Receptionist in the main navigation
- Go to **Advanced Settings section **and scroll down
Step 2: Enable Call Recording
- In the Call Recording & Features section, find the Record Calls toggle
- Click the switch to enable call recording
- You will see a confirmation message: “Call recording enabled successfully”
Accessing Call Recordings
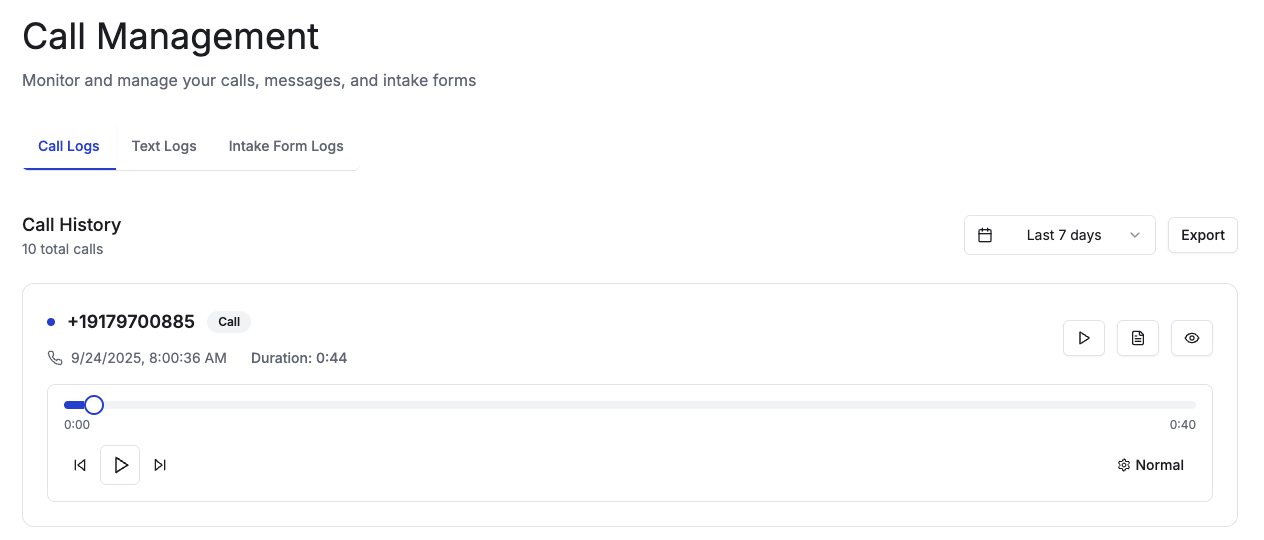
Step 1: Navigate to Call Management
- From your dashboard, click on Call Management in the main navigation
- Select the Call Logs tab to view your call history
Step 2: Locate Recorded Calls
- Browse your call logs to find calls with recordings
- Calls with available recordings display a Play button (▶️) next to the call details
- Calls without recordings will not show the play button
Step 3: Play Call Recordings
- Click the Play button next to any recorded call
- The audio player will appear below the call details
- Use the player controls to:
- Play/pause the recording
- Adjust playback speed
- Skip to different parts of the conversation
Step 4: View Call Details
You can also access additional call information: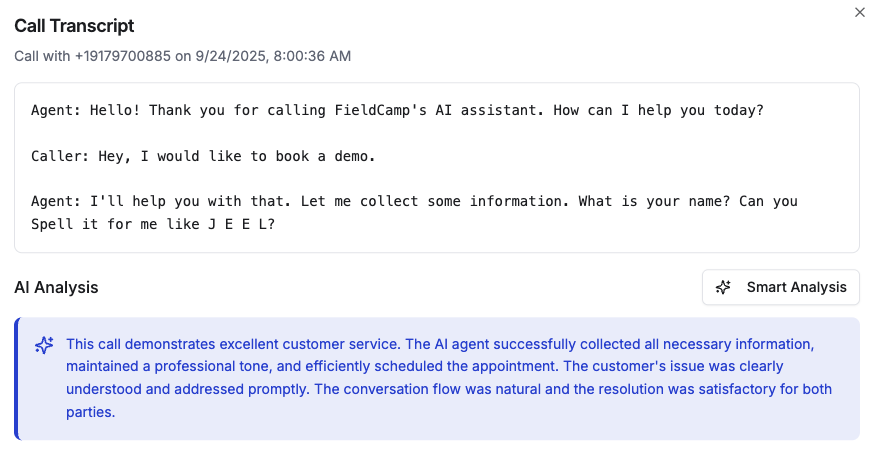
- Click the Details button (👁️) to view complete call information
- Click the Transcript button (📄) to read the conversation transcript
- Use the Smart Analysis feature for AI-generated call insights
Recording Storage
Call recordings are securely stored in encrypted cloud storage with the following characteristics:- Format: High-quality audio files
- Access: Temporary secure URLs generated when accessed
- Retention: Recordings are available for the duration of your subscription
- Security: All recordings are encrypted and accessible only to authorized account users