Adding Text-Based Knowledge
Train your AI receptionist with custom business information using text content. This guide shows you how to add important business details that your AI can reference during customer conversations.Accessing Knowledge Training
- Log into your Welco dashboard
- Navigate to Knowledge Training
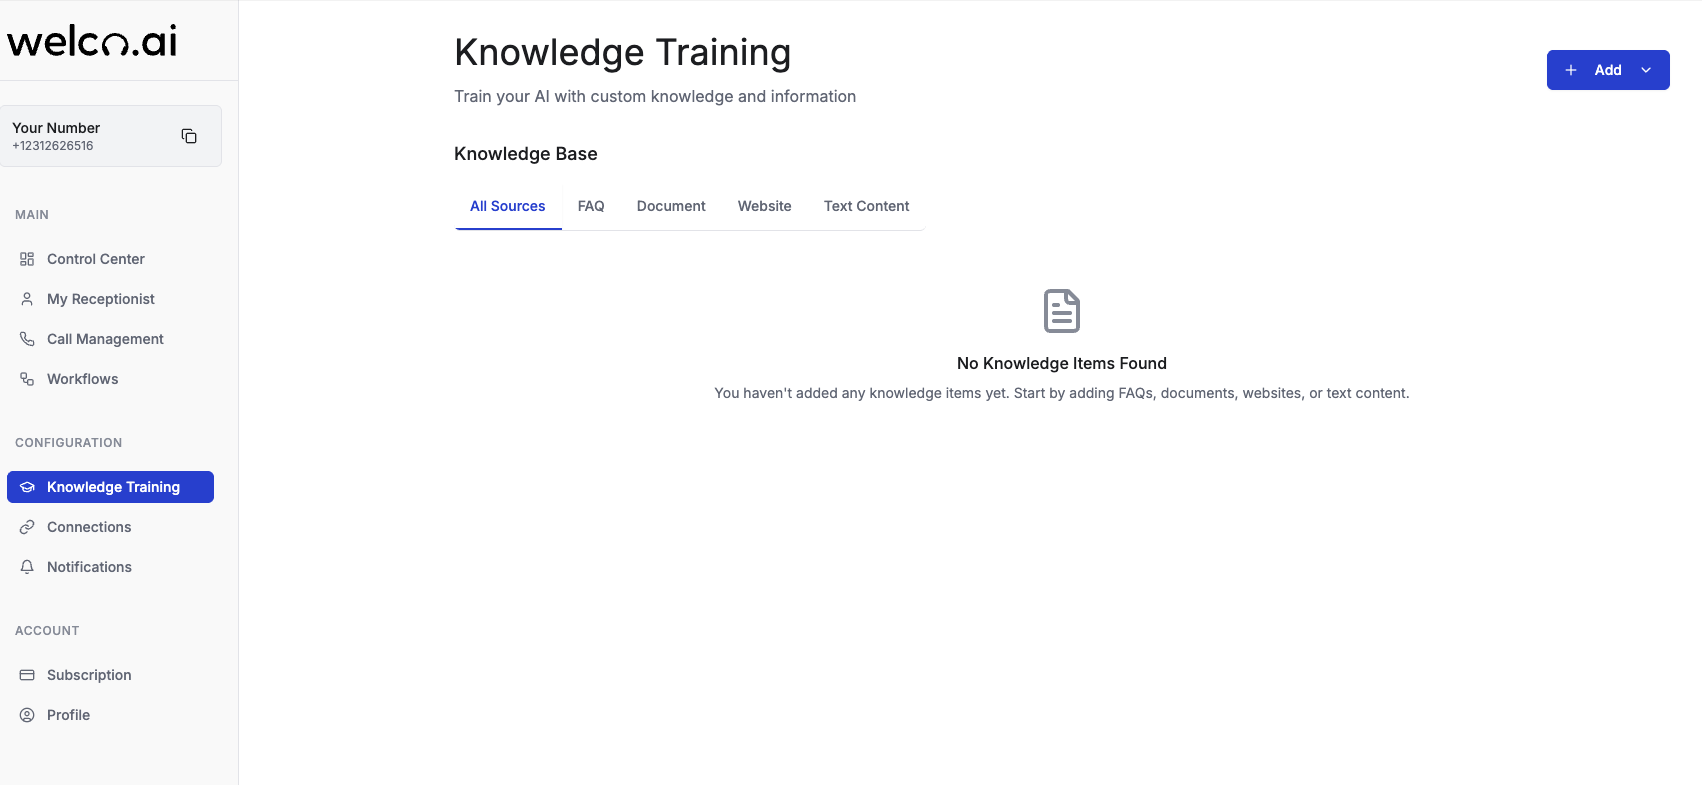
- Click Knowledge Training in the left sidebar under “Configuration”
- You’ll see the knowledge base management interface
Adding Text Content
Step 1: Open the Add Content Dialog

- Click the + Add button in the top-right corner of the knowledge base section
- Select Add Text Content from the dropdown menu
- The “Add Text Content” dialog will open
Step 2: Fill in Content Details
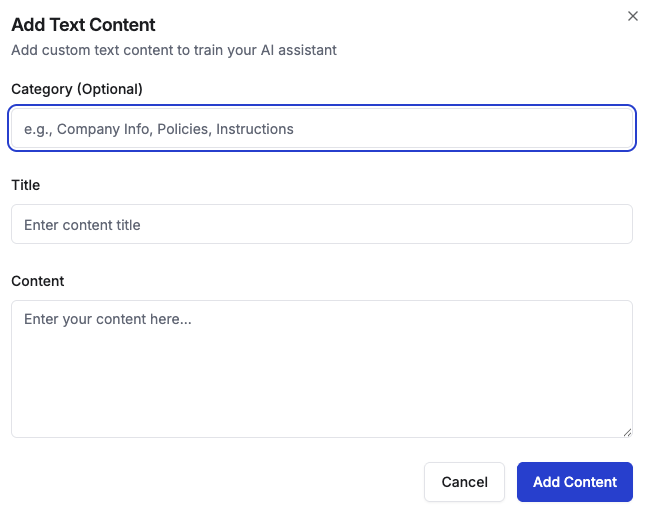
- Enter a category name to organize your content
- Examples: “Policies”, “Services”, “Hours”, “Pricing”
- Leave blank if you prefer not to categorize
- Provide a clear, descriptive title for your content
- This helps you identify the content later
- Example: “Business Hours and Holiday Schedule”
- Enter your business information in the large text area
- Include comprehensive details your AI should know
- Use clear, concise language
Step 3: Save Your Content
- Review your entries for accuracy
- Click Add Content to save
- The dialog will close and your content will appear in the knowledge base
What Information to Include
Business Operations
- Operating hours and holiday schedules
- Service areas and coverage zones
- Appointment booking procedures
- Pricing structures and payment methods
Company Policies
- Cancellation and refund policies
- Service guarantees and warranties
- Emergency service availability
- Customer service standards
Service Information
- Detailed service descriptions
- Process explanations
- Common procedures and timelines
- Equipment or materials used
Contact and Location Details
- Office locations and addresses
- Department-specific contact information
- After-hours contact procedures
- Service territory boundaries
Content Format Requirements
Structure: Write in clear, complete sentences Length: No specific limits - include all relevant details Style: Use professional, customer-friendly language Organization: Group related information together ℹ️ Note: The AI will reference this exact text during conversations, so ensure information is current and customer-appropriate.Managing Your Text Content
- View Content: All text entries appear in the “Text Content” tab or “All Sources” view
- Edit Content: Click the options menu (⋮) next to any item and select “Edit”
- Toggle Active/Inactive: Use the switch to enable or disable content without deleting
- Delete Content: Use the options menu to permanently remove content
Next Steps
After adding text content:- Test your AI receptionist to verify it can access the information
- Add additional content types like documents or websites
- Review and update content regularly to keep information current